Laughing Tortoise Sign: Part 2

Once the three layers of the Laughing Tortoise sign had finished routing, we used a die grinder to whip the shell into rough shape Then, we used compressed air to blow off the dust before gluing them up with Coastal Enterprise’s PB Bond 240. We also glued in a 1/2" steel rod for the neck. This sign is bound to get more than a little handing once it is installed; the steel will provide it plenty of strength!

Once the glue dried we gave the Tortoise Beer sign the once over with the die grinder. We carved in the scroll detail and textured up the sides to match.

After this it was time to do some preliminary sculpting on the tortoise. (The tortoise will be semi-realistic with a heavy dollop of character added.) We roughed in the head first — often, it works better to build up a foundational shape and then go back to add a detailed layer later. Then we roughed in the shell and feet. (The scales on his legs are just balls of sculpting epoxy.)

The side view shows just how dimensional this sign really is.

Once the first layer of sculpt dried, we finished sculpting the tortoise. The whole head and neck received another layer of sculpt — lots of character, wrinkles and laugh lines too.

Next week we will go through the painting process.

Laughing Tortoise Sign: Part 1

The Fox & Hounds Pub project included a number of fictional beer advertisements. The pub is British, its timbers are, reportedly, from an actual pub in Britain. We needed these fictional signs to match this theme:

A quick internet search revealed that the Galapogos Islands were, apparently, discovered by a British sea captain who was blown off course in a fierce storm in 1593. This little tidbit inspired the “Laughing (Galapogos) Tortoise Beer.” (A beer that is best enjoyed at a very slow pace!)

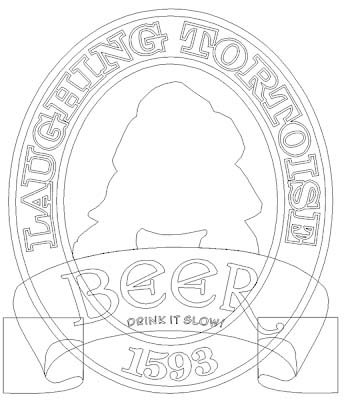
We designed the sign in Illustrator — importing the vectors into EnRoute. The tortoise was just an outline at this point and would be hand carved and sculpted once the rest of the sign was routed.

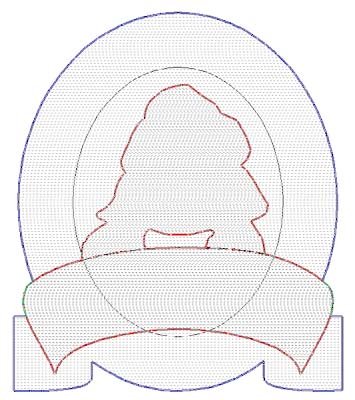
The sign was routed from two layers of 1.5" thick 30 lbs. Precision Board HDU (high density urethane). To build the file, we separated the vectors for each layer and created reliefs for each element.

The next screen shot shows the various files as we merged (highest) them together. The blue outline is the base file while the red outlines are the files we merged to it.

We also created an oval with the”laughing tortoise” text.

We also built the scroll and “beer” lettering. It was machined flat since we planned to do a little hand sculpting later to finish the curved ends of the scroll and blend it into the bottom layer.

It didn’t take long to finish up the file and send it to the router.

See you next week!

Fox Head Sign

Our Fox & Hounds Restaurant project included several sculpted trees. A sign hangs from a branch in one of these trees.

As a first step in creating the sign, my father opened the driftwood bitmap from our Texture Magic: Classic Collection in Photoshop.

Then he used the warp tool to shape the bitmap into a gentle 'S' curve.

Once he was happy with the texture, he traced an outline with vectors and then imported them (and the modified bitmap) into EnRoute.

He also opened, copied and pasted the fox medallion he had previously completed. He resized it and added some shoulder pieces to make the sign flow. He added a sandblasted woodgrain texture to the shoulders.

My dad also created a separate relief for the lettering border and added some domed lettering.

Finally, he created a second copy of the sign and flipped it before adding the lettering to each side. (This way the two sides fit together to form a double sided sign.)

As you can see, the sign routed up quite nicely.

See you next week!