Name Tags

Ribbon Panel

The trick to making the most of EnRoute is to combine a handful simple operations to build a more complex file. It takes the ability to visualize the final result to pull it off, (and some practice) but the results are well worth it.

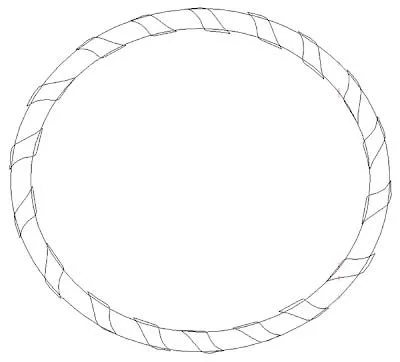
This week we will build an oval with a ribbon wrapped around its edge. The first step is to build the vectors for the ribbon, along with the borders.

The top and bottom loops of the ribbon vectors then need to be separated with two of the oval vectors.

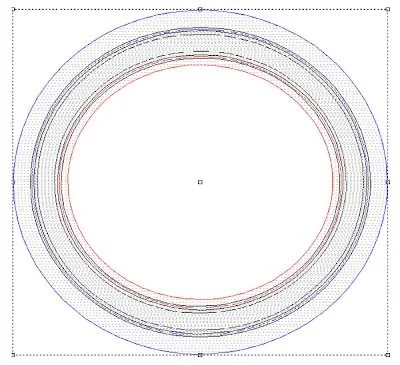
Then you can use the ovals to create an upward/downward donut shaped relief. Extrude the upper shapes of the top loops of the ribbon to 0.75" tall. Extrude the lower ribbon with the vector shapes at 0.15" tall.

Then you can create a narrow donut for the ribbon to wrap around.

Once these pieces are built and aligned you can merge everything together.

After this you can built the two ring reliefs that will frame the ribbon.

Also create a wider domed oval relief to be the base for the ribbon weave and other elements.

And lastly, create a dome relief for the centre.

Since all these elements are separate, you can float them vertically until you are happy.

Once you are happy with the look of all the elements together you can add the texture and the letting.

Imported a bitmap texture (We used one from our Texture Magic: Classic Collection) and resized over the oval. Then apply the texture (we assigned it a height of 0.15").

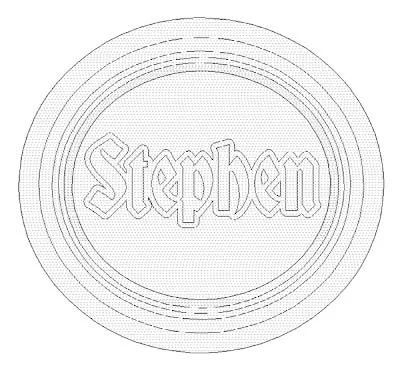
Next you can built a flat relief of the lettering outlines. (You can modified it using an oval vector to match the profile of the textured oval background.)

Used the bevel tool to create the lettering.

You last step will be to create a zero height relief to merge everything to.

Then your plaque is ready for tool pathing and routing.

As you can see, some pretty cool effects can be achieved by building things step by step. The secret is to start simple and build on your knowledge and experience.

See you next week!
Name Tag 018: Don

Thirty or forty years ago my father read an article detailing a new technique to sandblast wood in order to raise the grain on the background of signs. The article was written by Mike Jackson. He rushed out and bought a large compressor, a sandblast pot and all the other gear he needed. The he’s started blasting, watching with awe as the softer wood melted away leaving the raised grain behind. The very first piece he did was a sample that still hangs in our shop to this day.

When he began exploring what was possible with EnRoute and a CNC router, he looked up at that old sample on the wall and wondered... could he duplicate the magic of sand blasted wood?

It took a while to figure out the best way to light and photograph that old wood sample. And, it took a while longer to figure out how to manipulate and enhance the photograph to work as a texture bitmap in EnRoute. But, when he finally got it right, he watched in awe once more, as this magical machine turned a sheet of high density urethane (HDU) into that same beautiful raised woodgrain.

More experimentation with modern acrylic paints meant that, eventually, we could duplicate the rich colours of the original wood as well. And as an added bonus, HDU does not split, weather, or lose its finish like wood is prone to do.

Don’s Workshop name plaque showcases the technique.

We started with that original sandblasted redwood texture bitmap.

Because Don’s name plaque was relatively small, we stretched out the bitmap vertically. Then, using the drawing tool we created some board shaped vectors.

We created flat reliefs from the vectors and then applied the texture with the bitmap.

Next, we used the rotate tool to arrange the letters of Don's name. After that, we used the dome relief tool to create some routed nails to 'hold everything together.’ Lastly, we merged it all together over a zero height background.

We'll use our glazing techniques to match the rich colours of dad’s old sandblasted redwood sign.

Name Tag 017: Khai & Kirsten

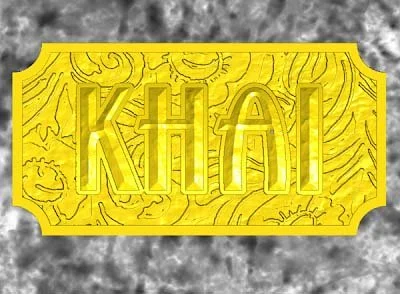
Parametric textures are a great tool and can be used to good effect. However, many times the textures we want to create can only be done with bitmap textures. In the case of Khai's panel, we could easily have created a vector of the design. It is an oversize belt buckle sign background and, with the powerful tools in EnRoute, it could have been traced/vectorized to achieve the same effect as the bitmap we used. Nevertheless, this would have added one more step to the process, so we opted to apply the bitmap directly to the relief.

As for the extra texture on the background and lettering, it could easily have been done with a parametric texture. Once again, however we opted to use texture bitmaps. That is the beauty of a program like EnRoute — there are more ways than one, to skin the cat.

Kirsten's name plaque puts us solidly back into bitmap texture territory — the ‘leaf’ texture would be difficult to create any other way. Our first step was to create the vector outlines in EnRoute.

The bitmap texture, on the other hand, was created in Photoshop. The leaves were simply cut and pasted, adjusted for value, and rotated randomly. Once this was done, we applied it in EnRoute.

Every user has favorite methods they tend to use, given the choice. Happily, EnRoute is powerful enough to give us a variety of options. Our advice? Try them all — as you continually push the boundaries you will find occasion to use them all.