
In our last instalment, we looked at building the Black Forest sign in EnRoute. Now we will take a quick peek at how we put it together.
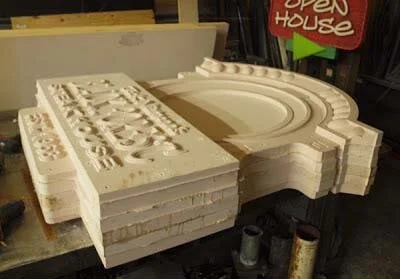
The sign was routed in seven layers of Precision Board HDU. The two main faces and the top trim were cut from 2" thick material, while the balance was done using 1.5" thick material.

As soon as the pieces came off the CNC router, we mocked them up to see how they looked together. We almost always do this — it helps us to plan for the next steps (and it just feels good to see our progress)!

After this, we propped up the pieces outside and gave them a good pressure wash to get rid of the fine dust leftover from the routing process. This dust can prevent a secure gluing. (These days we use compressed air to accomplish this task.)

Once the pieces were clean, the next order of business was to weld up a rectangular steel frame that would be laminated inside the sign.
High density urethane is very sturdy (particularly the 30 lb. variety), however it doesn’t have any structural strength. To overcome this limitation, we incorporate steel frames into all our signs.
In this case, we cut out half round shapes by each location for the mounting studs. This gave us room to weld the half inch bars in place “in situ” after drilling holes from the sides to insert the solid steel rods.


After this we glued our pieces of HDU up. We used plenty of countersunk screws to hold the many layers together until the glue dried.
Before we go any further we need to even up the sign’s edges with the die grinder. After that we will weld on the sign’s bracket so we can fasten the sign to a temporary stand in order to work on it safely.
In our next instalment, we will start work on the knight that will stand in the oval.