Cap-it Trucks - Part 1

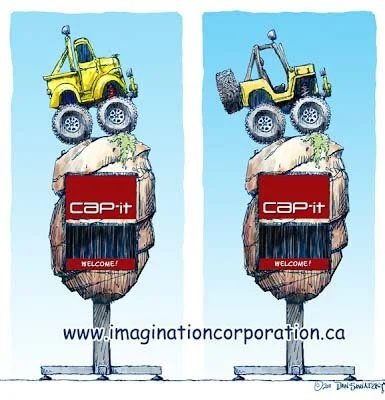
These two signs stand at the entrance to the store, both to welcome customers and to hold their catalogues. Appropriately, they both feature four wheel drive trucks.

capit signs.jpg

Once the design was complete the first step was creating the wheels. The files for the wheels built in EnRoute and were routed from inch and a half 30 lb. Precision Board HDU.

wheels 1.jpg

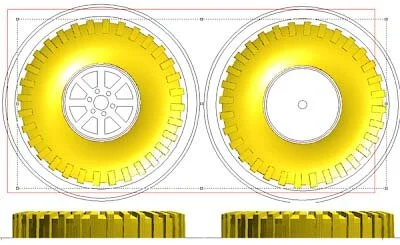
Above you can see the tires’ basic vector shapes. We used these vectors and EnRoute’s jigsaw tool to cut out the holes in the wheels. Then, we added the wheel centre caps and lug nuts.

wheels 2.jpg

The sidewalls were created with a simple dome relief.

wheels 1_1.jpg

The sidewall lugs on the tires were flat reliefs modified with inner and outer circle vectors.

wheels 2_1.jpg

We built up the various wheel components and added the sidewall letters. These featuring our customer's brand, of course. The back of the wheel center shows the back of the brake assembly.

wheels 4.jpg
wheels 5.jpg

Once the file was complete, we sent it to the CNC router to be cut.

capit wheels in progress.jpg

Name Tag 014: Mark

mark routed.jpg

When Mark attended our workshop, he was in the process of moving to Hawaii. We figured we would celebrate his move with a tropical theme. After a little head scratching, we settled on a palm leaf for his name plate. The lettering style is very casual and the leaf was quickly drawn directly in EnRoute.

We took a screen capture of the result and then used a big fat, soft brush to draw the leaf’s outline on a new layer in Adobe Photoshop.

When creating bitmap textures, it is important to keep in mind that black does nothing, white will raise up (or lower down) the most and various greys will sit somewhere between those extremes.

mark 2.jpg

After deleted the screen capture layer, we saved the bitmap so that it would be ready to be imported it into EnRoute.

mark 3.jpg

Next, we selected the vector and created a flat relief.

mark 4.jpg

After this, we used the oval vector to modify the leaf relief with the dome tool.

mark 5.jpg

Next we imported bitmap we had created earlier and positioned over the leaf shape. We used a .75" value in the parameters which meant it raised up the white .75"

mark 6.jpg

Combined with the previous dome shape, it was looking pretty fine!

mark 7.jpg
mark 8.jpg

The separate stem relief was created next using the dome tool. The resulting relief was modified with the oval vector and then nudged to the right height.

The lettering outline was next, first as a flat relief and then modified with the oval.

Then he oval vector was used to create a plaque for the background. We used the bevel tool but limited the height to give the plaque a bevelled edge.

Lastly, everything was “merged highest” before we added the slightly domed lettering.

mark 9.jpg

Name Tag 013: Kara

kara 6.jpg

Kara’s workshop panel features a flowing script over a pattern of fall leaves.

The bottom border was created as a flat relief and a slight dome was added to the centre.

The text’s outline of the lettering was also created as a flat relief and then modified using a similar sized oval.

The lettering border and the plaque were created separately so they could be floated intoto final position after the leaf texture was applied.

kara 1.jpg

The maple leaf bitmap texture is another from our Texture Magic: Classic Collection. When applying the texture in EnRoute, it’s important to remember that the whites raise the highest, then the greys and the black does nothing.

kara 3.jpg

After applying the texture, the lettering’s border was nudged into position vertically and then merged with the background.

kara 4.jpg

Finally the bevelled script lettering was added finishing the file.

The panel was routed from 1.5" 30 lb. Precision Board HDU in about 30 minutes. This heavy board leaved superb detail and requires little finishing.

kara+6.jpg