McIltrot Sign - Part 1

About a decade ago, Tom McIltrot, the editor of SignCraft, asked my father to make a small address sign for his parent’s home.

So, he whipped up a quick sketch in his ever-present sketchbook. As you can see, it was quite rough, but it captured enough information to get him started.

He imported that rough scribble into Photoshop along with one of our texture bitmaps, which he then warped to the appropriate shape. Once this was done, he drew a vector outline of the signboard.

Moving to Illustrator, he added in the vectors for the lettering and modified the name to match the curving sign bottom.

Normally dad wouldn't bother rendering a project this small, but this time he opted to fleshed out his sketch and sent it off for approval — happily, he got a reply in seconds. The senior Mrs. McIltrot checked it out and instantly approved it — if only dream more of our clients were that responsive!

With the stamp of approval in hand, dad created a relief in EnRoute using the dome relief tool. The dome shape was a slight 13 degrees. Then he plopped on the wood grain bitmap file and formed the gnarly grain. Since this was meant to be a piece of driftwood, he made it a substantial 0.4" deep.

Then he used the virtual sculpting tool to deepen the creases in specific areas as indicated by the red arrows. It didn't take long but the effect was quite dramatic.

The end view below shows how the virtual sculpting tool made these areas deeper, enhancing the wood grain.

Next he outlined the letters and formed flat reliefs. After this, dad drew an irregular curved shape and use this vector with the dome relief tool to modify the text reliefs to match the shape of the wood background.

In about twenty minutes the sign had gone from approved sketch to the finished routing file. (It took longer to warm up the CNC router!)

Once the router was warmed up, he started the file. And just like that, the sign started to come to life as the router automatically carved the Precision Board High Density Urethane.
Dirigible Model - Part 7

The final piece for our dirigible is a four foot long banner for the balloon to tow. It will have our name on it — this is advertising after all.

For maximum effect, its ‘wave’ will move both vertically and horizontally. We created the basic vectors and lettering in Illustrator and then imported these to EnRoute.

The next step is to size everything (as one unit). Then we added a border around the letters using the outline tool.

we created a flat relief and then imported a bitmap called ‘Splotches’ from our Texture Magic: Classic Collection. We selected the banner and the bitmap to light up the button shaped like a mountain and sky. A value of 0.15 created a subtle texture over the entire surface.

Then we selected the banner and the lettering outline to raise this area slightly from the background. If we had wanted this area to not have texture we could have built a separate relief and merged them later.

Last up was the slightly domed lettering which was raised 0.15 off the outline to make it easy to paint later.

We sent the finished file to the CNC router and then it was time to do a little bending.

We have a heating blanket for just such an occasion. We put it under the banner and let the heat soak in good. A full bucket of paint and block of HDU provided the weight we needed to bending the banner.

When we were satisfied with the curve, we turned off the heater and let everything cool down. The result was a banner that looks like it is flapping in the wind.

As usual, we mocked it up behind the balloon to make sure everything looked right before moving on to paint.

Once the last of the painting was complete we hung the finished dirigible in its permanent home in our studio.

And just like that, our first fourth axis routing project was officially done!

Dirigible Model - Part 6

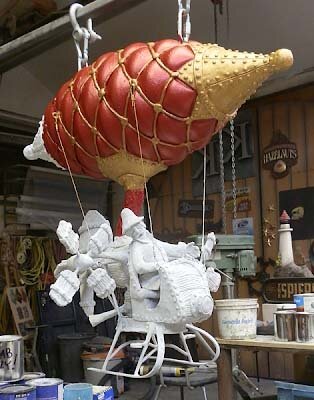
We assembled the nose cones with screws and PB Bond 240 - a one part glue ( formulated for HDU) from Coastal Enterprises. It is activated with a spritz of water and tends to expand some as it cures. As a result, we have to do a little cleanup and shaping with a die grinder before covering the nose cones with some sculpting epoxy (to add some detail).

The finished sculpt on the nose cones (as well as the hand crafted cables around the balloon) give the balloon a hand made look — matching the gondola underneath.

Once the epoxy sculpting medium had cured to was time to apply a coat of FSC-88 WB primer. This primer is heavy bodies water base primer from Coastal Enterprises. (We call it “marshmallow paint” in our shop.) We applied it by hand with a small brush to introduce a little more texture over the entire surface.

Once the primer had cured it was time to start in on some colour. As usual, we used acrylic paints. The metallics are from Modern Masters and look great - even on the first coat. Everything will get a second cot and before we start on the glazes to add depth and some aging.